How To Draw A Hill. As for the various subjects and themes depicted in art, landscapes have been one of the most popular for many centuries. No matter where you are in the world, natural beauty is to be discovered, so it only makes sense that artists want to capture that beauty. However, knowing where to start when you want to draw something as familiar as a hill can be challenging. However, learning how to draw a hill is a great way to start this drawing quest!
This is definitely the proper tutorial if you ever want to know how this can be done. Our step-by-step guide to drawing a hill will show you everything you need to know to recreate this beautiful scene. You can draw many more characters like easy house drawing, Anubis drawing, cat drawing, cobra drawing, blueberry drawing, coconut drawing and many more drawing for kids.
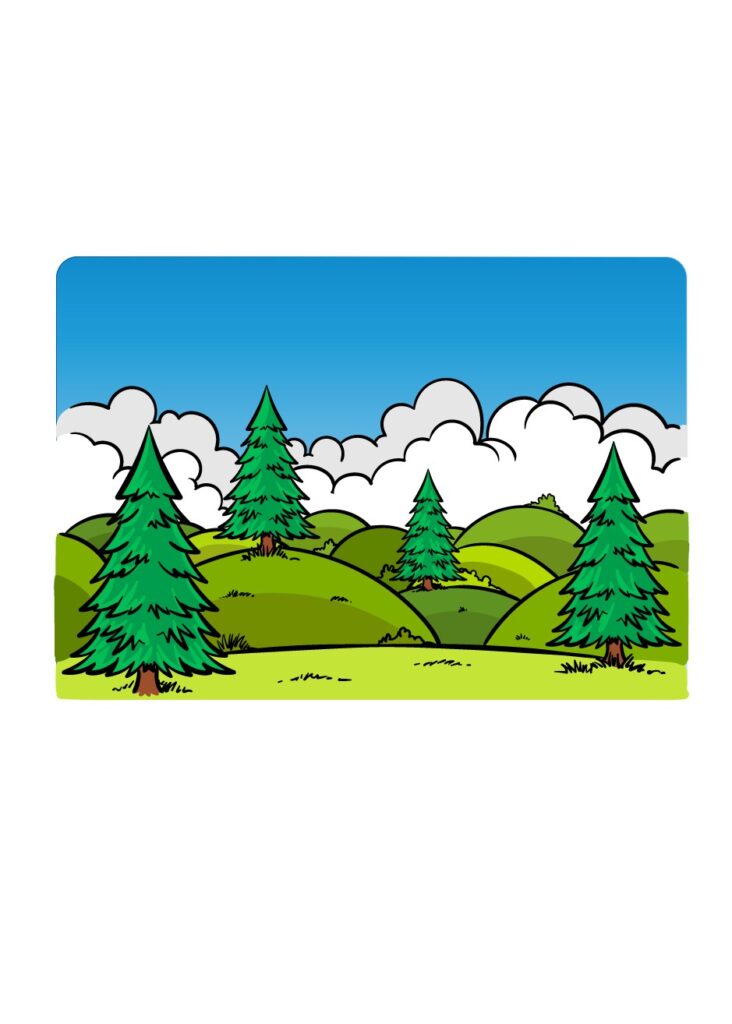
Step 1:
The key to creating a fantastic landscape is to build it slowly with more minor elements. This is the approach we’ll take in this guide to drawing a hill, as we’ll slowly add various elements to build the scene. In this first step of the guide, we will draw a pine tree for the scene and the first hill itself. We’ll use many small, curved lines with sharp points at the ends for the pin. The shaft tip will start thin, but the lower sections will gradually become fuller. Finally, you can complete this first step by drawing a long curved horizontal line behind the tree. Once these parts include been removed, we can haul on to the following step!
Step 2:
The first step in this hill drawing saw you add a single pine tree to the scene, and this second step will have you add another with some minor detailing. This second tree will have a structure relatively identical to the first. The primary distinction is that it will be smaller to show some attitude. To complete this step, you can draw a few small jagged lines across the grassy expanse to give it some texture; then, it’s time to move on to step 3.
Step 3:
Now that you’re getting used to this drawing, we can start adding more meaningful landscape elements in this step of our guide to drawing a hill. First, we’ll draw some hills in the background. These will be drawn using large rounded overlapping lines. You can then draw another tree on the two hills to the left, and again they will get smaller and smaller to show perspective. You can add more small grass details to these hills before moving on to the next part.
Step 4:
Before we form counting some last pieces to this cliff picture, let’s complete the actual cliffs. To do this, you can resume doing what you started in the earlier step the direction. This means you can draw more rounded lines to add more hills to the background behind the first ones. Like we did with the trees, these hills get smaller as you move back to show that they are farther away. Then all you have to do is finish the final details and touch-ups in the next step!
Step 5:
The landscape for this composition is complete, and now we will add the finishing touches before the final step of this guide on how to draw a hill. In this feature, we’ll count many superb palls over the cliffs to finish the picture well. To draw these clouds, we will use much smaller curved and rounded lines that connect to create a large mass of fluffy clouds. These clouds will also overlap the same way you overlapped the distant hills. Once the clouds are drawn, you can finish with the final details! Are you moving to count climate results or maybe structures, individuals, and creatures wanting this tranquil location?
Step 6:
Your hill drawing is already impressive, and in this step, we’ll make it even prettier with some colors! Our reference image shows you one way to color this peaceful scene. We kept the image bright and cheerful by using vibrant greens for the grass and trees. While you can opt for an equally bright and vibrant look, you can create a more subdued image with darker tones. The media you use will also contribute to the feel of the image; For example, you can use watercolors for softer colors or mediums like acrylic paints for more vibrant tones. These are just a few mediums and color options you could use, so how did you?